GDS3710 with WP820
In this example we will show you how to configure a Grandstream WP820 in order to work together with a GDS3710. WP820 supports audio and video when integrated with GDS3710.
Note: that in order to work with video preview and to configure the open door option on the phone you need to work with FIXED IP addresses on the GDS3710 and on the Phone. The fixed ip can be configured through the portal if you don’t have a DHCP server. Please make a reservation for these devices if you have a DHCP server.
Part 1 : GDS3710
Grandstream GDS3705 and GDS3710 Door Phones are configured partly on the portal and partly via the device GUI.
1. Provisioning the GDS3710 through the portal
Add a device of type Door Phone.

Fill in the Device Nickname, Mac Address and select the model and type. Once the device is created connect your Door Phone to the Internet. In the example we choose a GDS3710.

When the provisioning is done you should be able to see the Door Phone between the registered devices on the server.

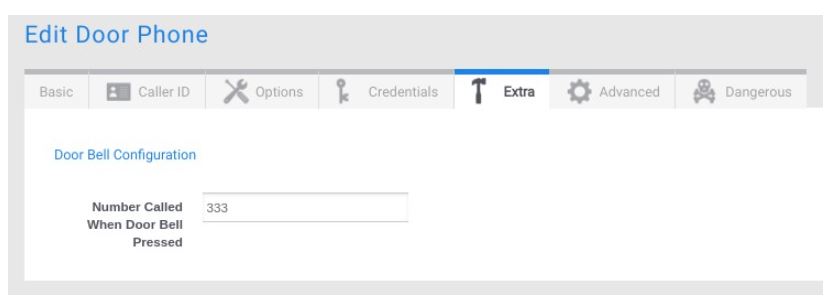
Configure the action of the doorbell button on the Door Phone via the extra tab of the device.
A. Without Video Preview:
Fill in the callflow (extension) number of the device that will be called when pressing the button (audio or video but without video preview before answering).
B. With Video Preview:
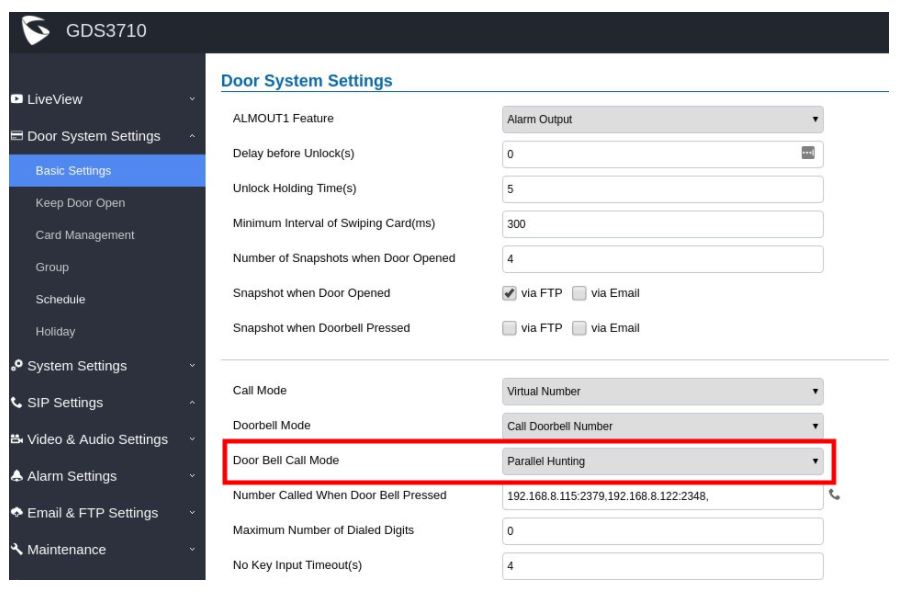
Fill in the IP address and local SIP port number of the device that will be called when pressing the button (audio or video and with video preview before answering).
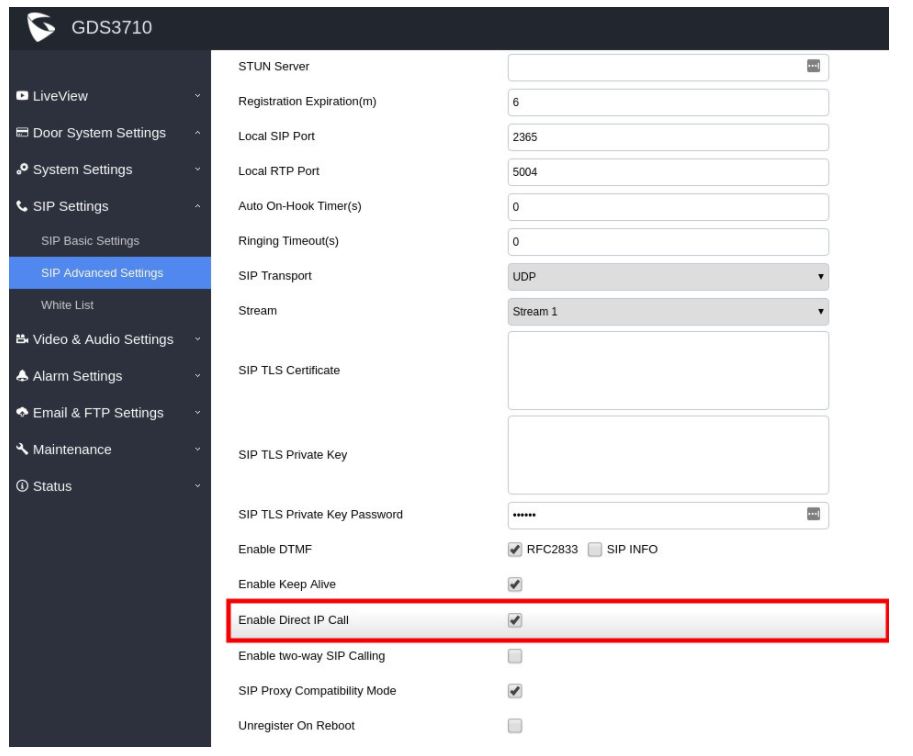
You can find the port number on the GUI of the phone under Account => SIP Settings => Local SIP Port.
Note: that it is best to use static IP addresses on your phones in order to have consistency with this type of configuration

Note: If you want to be able to call multiple destinations you can separate the inputs with a comma (up to 4 simultaneous SIP calls).
Timing can also be changed to this page. It should be left to 0 info you want to do multiple ring and changed to the desired timing if you want to ring the devices in order.
2. Settings to be configured through the GDS3710 GUI
– Enable Direct IP call if you want to obtain de video preview. In this case the call will be established on the local network without going through the server.
– You need to chose between Serial Hunting and Parallel Hunting depending on the ring strategy that you want to be applied when the Door bell button is used. In case of Serial hunting, the timing between stations is determined via the ring timeout that you configure in the extra section of the device on the portal.
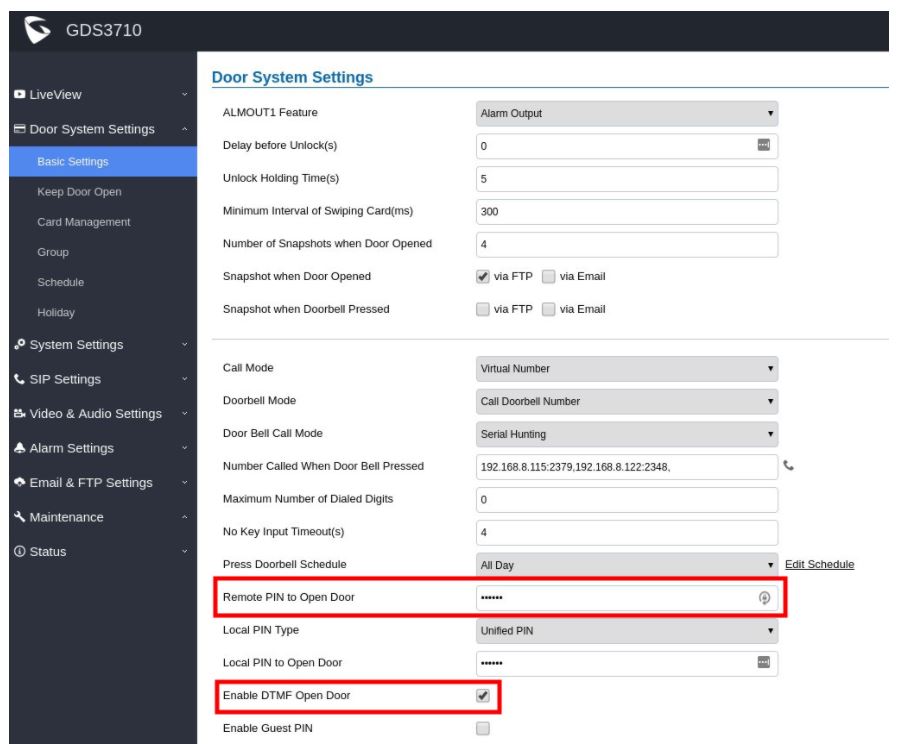
If you need to open a door with the Door Phone please ensure that you defined a Remote PIN code and that you enable the DTMF to open the door.
Part 2 : Configure the Phone
1. Provision the phone via the portal
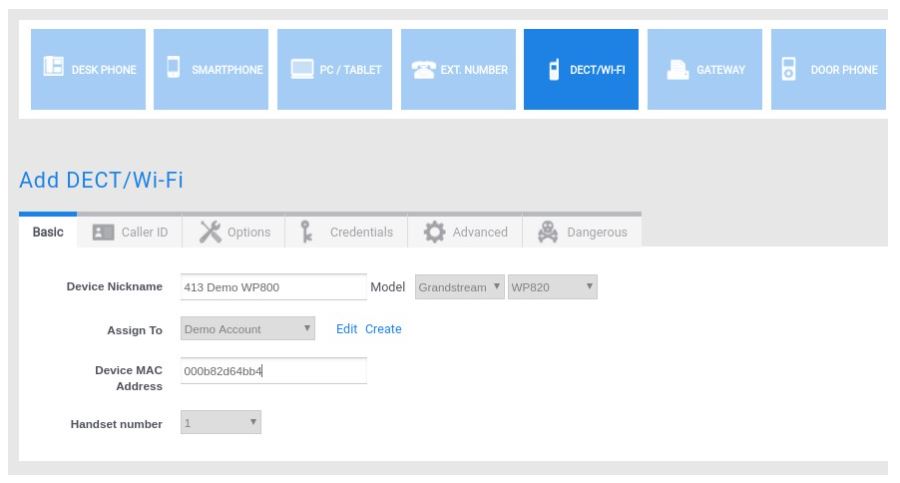
Choose a device nickname, assign the phone to a user and enter the MAC address of the phone in the portal. Select the appropriate Model of phone and push on the save button.
2. Configure the open door button via the device GUI
Enter the local IP address of the phone in your browser in order to access the GUI of the phone. Login wih the admin credentials of your device.
Configure the ‘Open door’ button on the phone in order to open the door with a single click.
1. Go to Value-added Service and click on Add (The WP820 supports up to 10 GDS3710 devices).
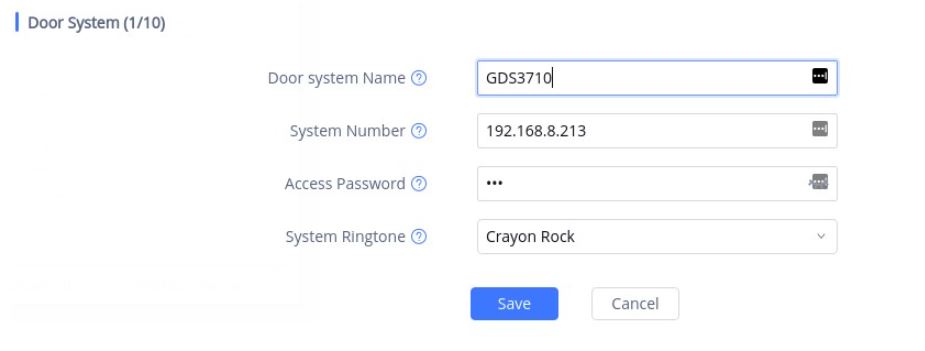
2. Enter the “Door system Name”, it can be any name to identify the GDS3710, in our case its “GDS3710”.
3. Enter the “System Number”, in our case its the IP address of the GDS3710 “192.168.8.213”
4. Enter the “Access Password” which is the password set on “Remote PIN to Open the Door” on the GDS3710.
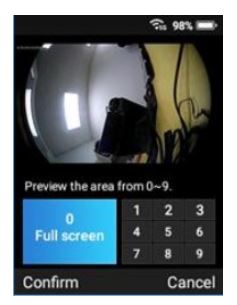
Note: The video preview is automatically enabled when you create the button.
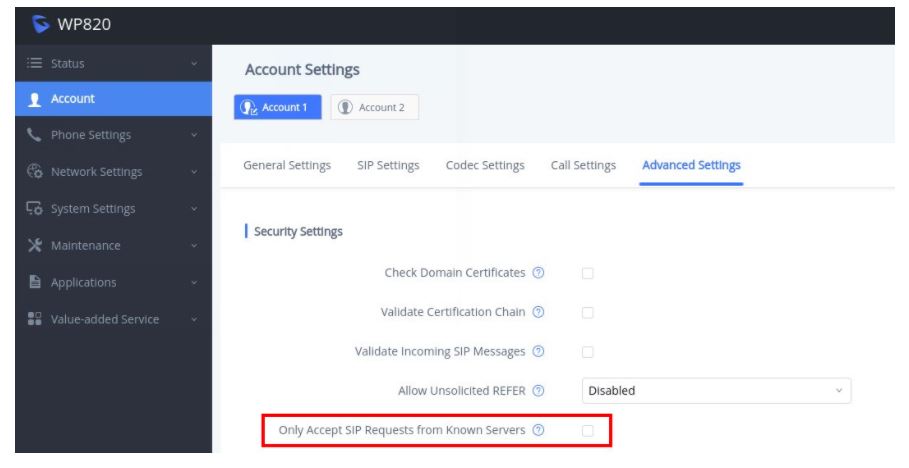
Now got to Account –> Account 1 –> Advanced Settings
Make sure that the parameter ‘Only Accept SIP Requests from Know Servers’ in NOT enabled.