Voicemail
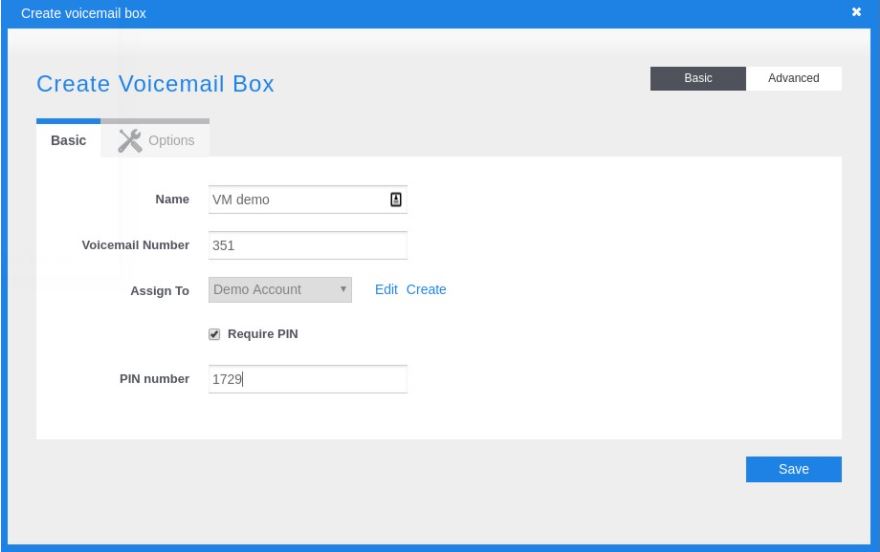
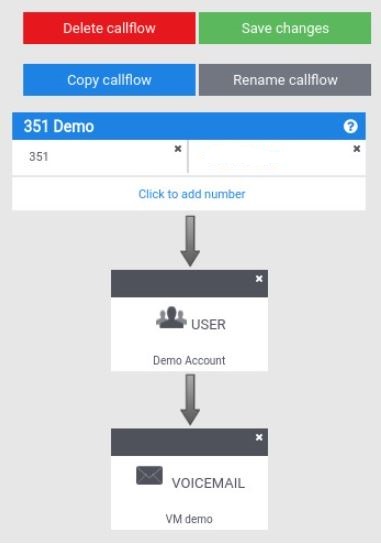
Voicemail setup for a user can easily be done by inserting the VM module after the user in the call flow. The system wil allow you to choose an existing VM box or to add a new VM box. In the example below we have chosen to create a new VM box. When making a new VM box you will have to choose :
- Name : This can be something relevant to the user like his name for example
- Voicemail Number : Make your life easy by choosing the same number as the internal extention from the user.
- Assign to : Link the VM box to the user
- Require PIN : Protect the access to the VM by a PIN code
The user can easily access his mailbox by pressing on the envelope button on his phone. If the user has no hard phone it is also possible to dial *97 + the number of the VM box.
The message of unavailability can be configured by calling the mailbox and choosing option 0
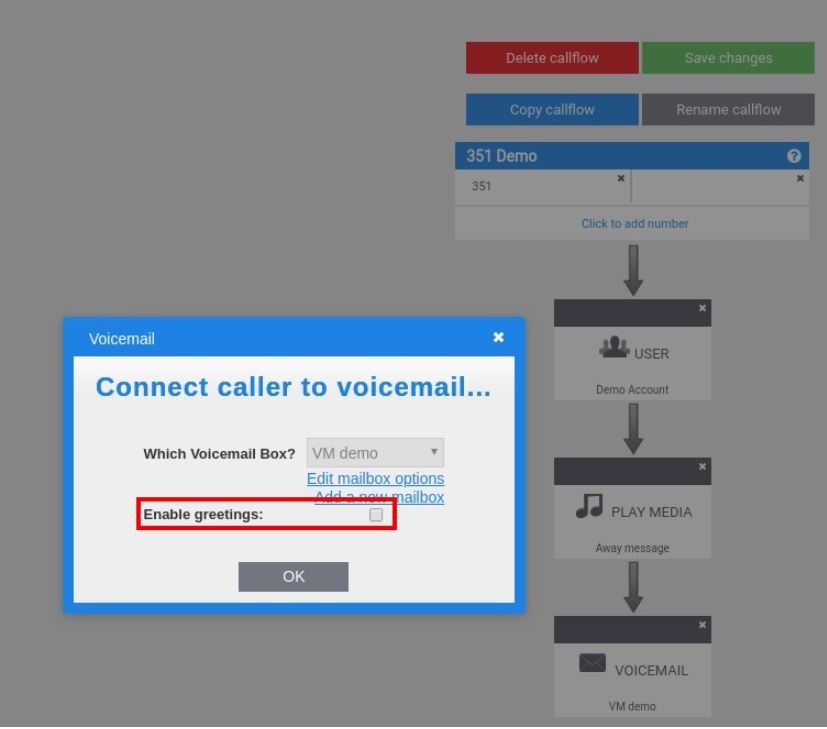
Another possibility to add an unavailable message is to use a ‘Play Media’ module in the callflow and inserting it between the user and the VM module. Look at the example below. Notice that you will have to remove the option ‘Enable greetings’ in the VM module in order to avoid to also play the unavailable message from the VM box.
The VM messages are sent to the user by email by default. This can be checked in on the user page.
Note : If the VM box is not linked to a user it is impossible to use the envelope on the phone of a user or to receive email notifications. In that case you will have to dial to the VM box on regular basis to check if new messages are available.

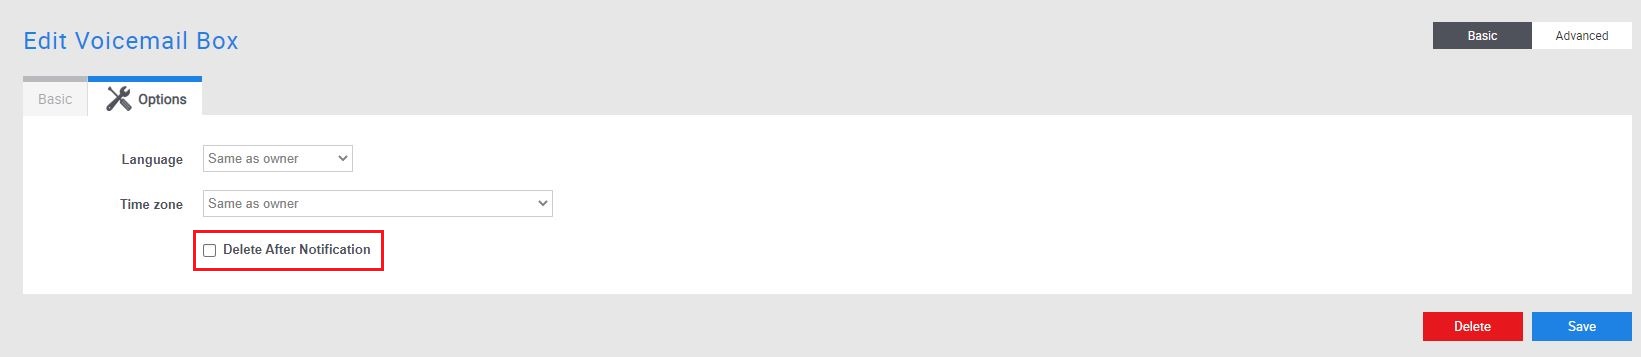
If you want to obtain the VM messages on the phone please untick the checkbox ‘Email Notifications’. You will also have to untick the option ‘Delete After Notification’ in the VM option. See next image.
Note: The capacity of a VM box is 100 messages.
If the user wants both, voicemail message through email and via the phone. Simple untick ‘Delete After Notification’ in the VM options but leave ‘Email notifications’ checked at user level.
You can also choose to set the default voicemail messages (the “enable greetings” option) to the same language as the User’s account (such as the “Owner”), or to the language you prefer.
Thus, when an incoming call is directed to your voicemail box, the caller will hear the default message from your voicemail box in the chosen language.
You can select the voicemail languages through the Menu Options –> Languages .

Note : It is not possible to send the voicemail message to several email addresses at the same time. You will have to make a general email address that can be accessed by different users needing to receive the messages or create a forward rule in your email server.